Getting Started with AWS Simple Email Service: A Step-by-Step Guide

Welcome to this comprehensive guide on getting started with Amazon Web Services (AWS) Simple Email Service (SES). AWS SES is a cost-effective, flexible, and scalable email sending service that enables developers to send emails from within any application. It comes with robust features such as content filtering, email receiving, and monitoring capabilities.
In this tutorial, I will walk you through the process of setting up AWS SES, creating and validating an email address, setting up an Identity and Access Management (IAM) user with the necessary permissions, and finally, sending an email using Python code. We assume you already have AWS CLI installed on your local machine and are familiar with Python programming.
Let's dive in!
Step 1: Create and Validate an Email Address in AWS SES
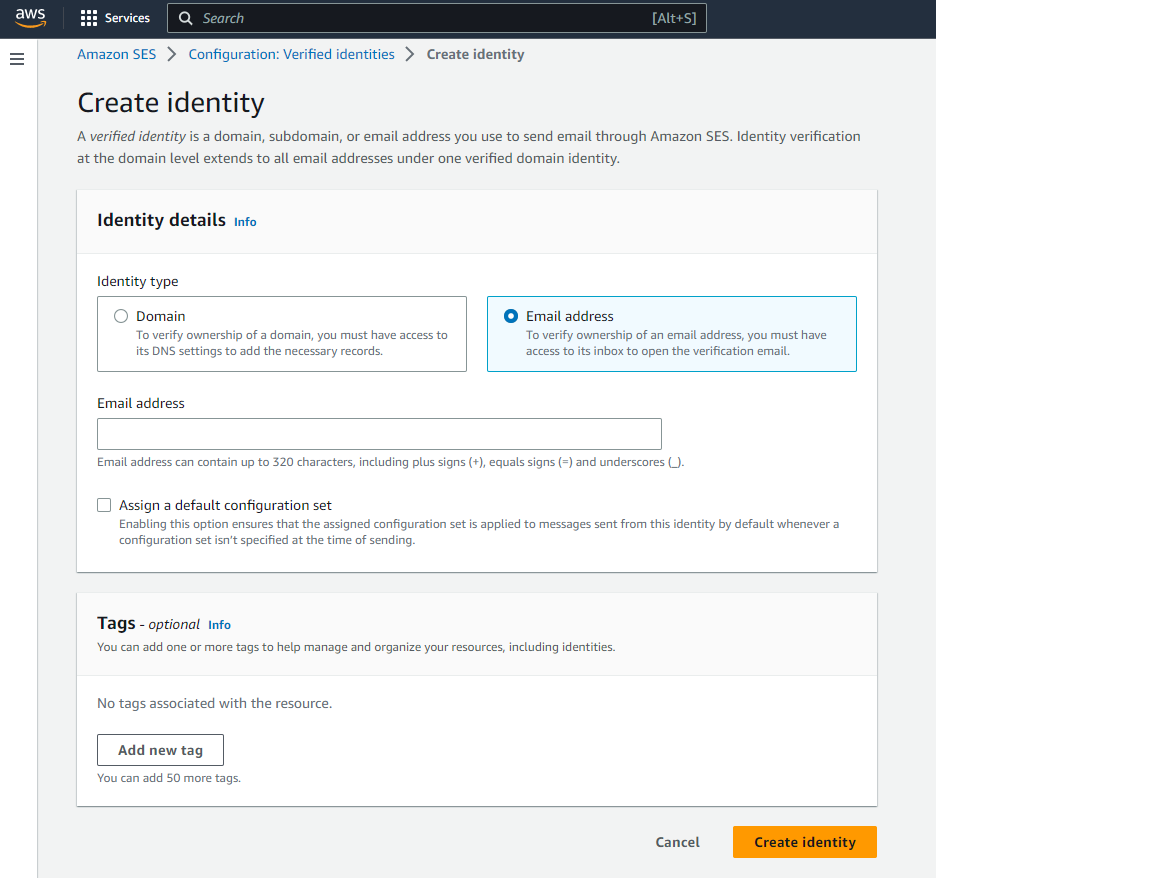
- Log in to your AWS Management Console and navigate to the SES service.
- Under "Identity Management" in the left sidebar, click on "Email Addresses."
- Click the "Verify a New Email Address" button.
- Enter the email address you want to use with AWS SES and click "Verify This Email Address."
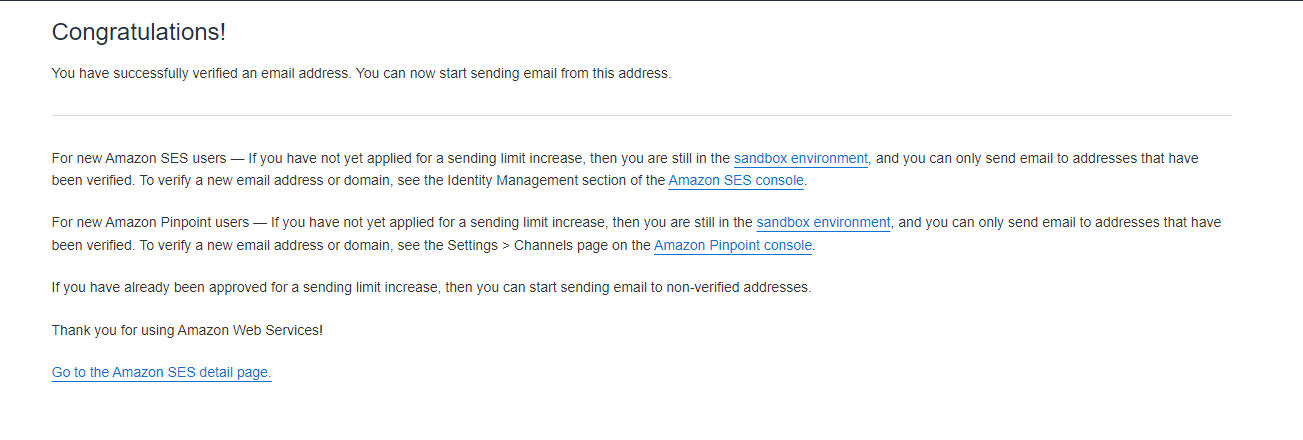
- Check your inbox for a confirmation email from AWS and click on the verification link.
Step 2: Set Up a Validated Domain
- Under "Identity Management" in the left sidebar, click on "Domains."
- Click the "Verify a New Domain" button.
- Enter your domain name and click "Verify This Domain."
- Follow the instructions provided to update your domain's DNS records.
- Wait for the domain verification process to complete (this may take some time).
Step 3: Create an IAM User with SES Access
- In the AWS Management Console, navigate to the IAM service.
- Click on "Users" in the left sidebar and then click the "Add user" button.
- Enter a username and select "Programmatic access" as the access type.
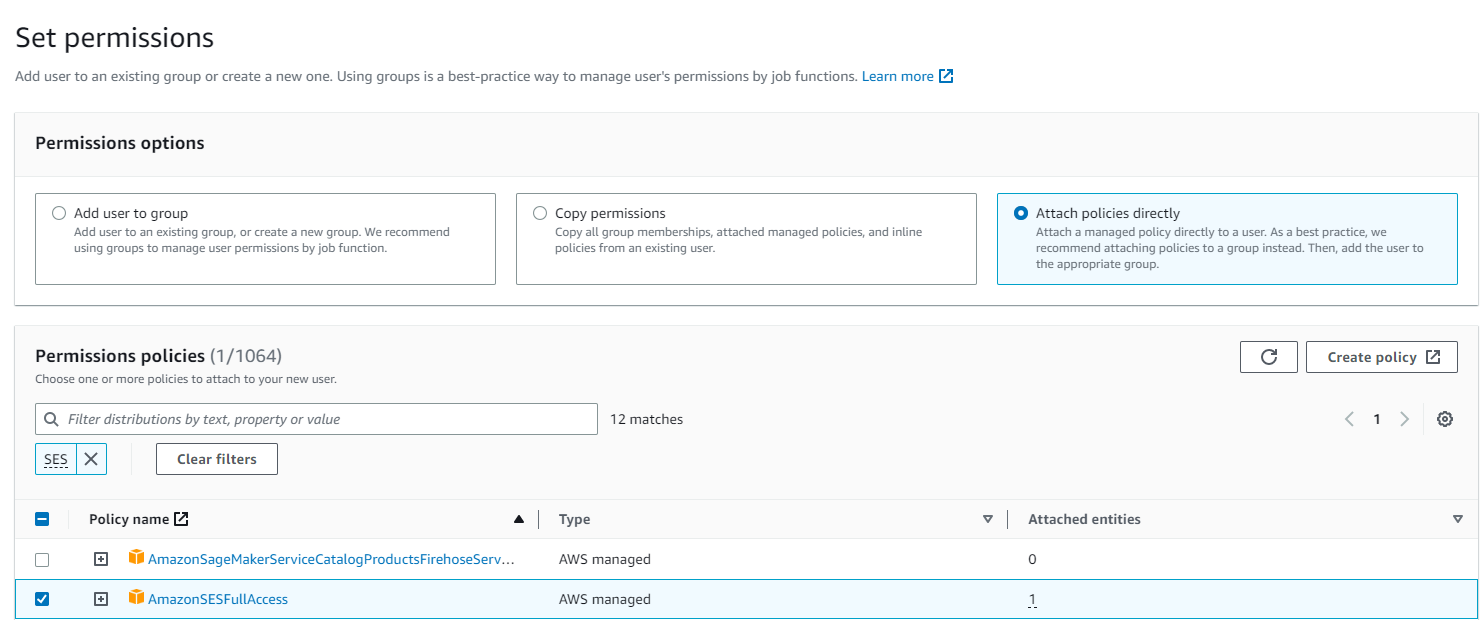
- Click "Next: Permissions" and then "Attach existing policies directly."
- Search for "AmazonSESFullAccess" and select the checkbox next to it.
- Click "Next: Tags" and then "Next: Review."
- Review the user details and click "Create user."
- Save the Access Key ID and Secret Access Key displayed on the screen.
Step 4: Configure AWS CLI with Access Keys
- Open a terminal or command prompt on your local machine.
- Run the following command:
aws configure - Enter the Access Key ID and Secret Access Key you saved in Step 3.
- Set the default region and output format as desired (e.g., "us-east-1" and "json").

Step 5: Send an Email Using AWS SES and Python
- Install the
boto3library by running:pip install boto3 - Create a new Python file (e.g., "send_email.py") and import the required libraries:
import boto3
from botocore.exceptions import ClientError
- Add the following function to send an email using AWS SES:
def send_email(sender, recipient, subject, body_text, aws_region):
    client = boto3.client('ses', region_name=aws_region)
    try:
        response = client.send_email(
            Source=sender,
            Destination={
                'ToAddresses': [
                    recipient,
                ]
            },
            Message={
                'Subject': {
                    'Data': subject
                },
                'Body': {
                    'Text': {
                        'Data': body_text
                    }
                }
            }
        )
    except ClientError as e:
        print(e.response['Error']['Message'])
- After defining the send_email function, add the following lines of code to the bottom of the script to call the function with your desired parameters:
if __name__ == '__main__':
    sender = 'your-validated-email@example.com'
    recipient = 'recipient@example.com'
    subject = 'Your Subject'
    body_text = 'Your email body text here'
    aws_region = 'us-east-1'  # Replace with your preferred region

    send_email(sender, recipient, subject, body_text, aws_region)
    print('Email sent successfully!')
Replace the placeholder values with your own validated email address, recipient's email address, subject, and body text. Also, ensure that you have specified the correct AWS region in which you have set up the SES service.
- Save the "send_email.py" file and run it from the terminal or command prompt using the following command:
python send_email.py
If the email is sent successfully, you should see the message Email sent successfully! printed in your terminal.
Conclusion
Congratulations! You have now successfully set up AWS SES, created and validated an email address and domain, configured the AWS CLI, and sent an email using Python code. With this foundational knowledge, you can easily integrate AWS SES into your applications and automate email sending for various use cases, such as notifications, marketing campaigns, or transactional emails. As you explore further, you can also take advantage of advanced SES features like email receiving, content filtering, and monitoring to improve your email handling capabilities. Happy emailing!
Note: You will need to request production access from AWS or you will have limitations such as:
- Low Email Limit
- Low email rate limit
- Only Sending to verified accounts
